Feb 3rd 2017
The Correct Position of a Violin Bridge
Christian Rapp of Summerhays Music works with all sorts of bow-string instruments. Many students bring in instruments with broken bridges and say “I opened my case and the bridge was broken. I didn’t do anything.” Over the years Christian has observed that not all the broken bridges are due to accidents or mishandling. A negligence in observing the angle of the bridge is often the problem.
Bridges have a tendency over time to move due to the string action when we tune the instrument. Strings are mostly too low, so we tune the instrument to raise the desired pitch, causing the strings to be pulled upward toward the pegbox. This action, times four, will over time move the bridge.
There is a misconception that bridges are glued or nailed to an instrument. This is a myth. The bridge is free standing on the instrument, held in place by the tension of the strings. Tuning over time causes the bridge to move, a process that doesn’t necessarily happen from one day to another, but over a lapse of weeks or months. We recommend that you check your bridge position every time you take it out of the case.
How to check then reposition your bridge:
Open your case, take your violin out and hold it in front of you. If the bridge is tilted toward the pegbox, and you do not do anything about it, sooner or later it will fall over and break.
- Do not panic!
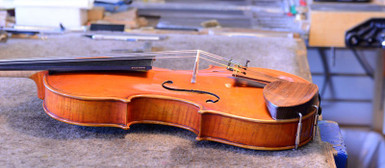
- If it is angled, put it on a table or surface in front of you with the pegbox toward your body.
- Take both hands and grab the bridge from the sides and very carefully push the bridge up till the surface of both feet is even with the top of the violin.
- The ideal angle of the bridge should be 90 degrees in reference to the top.
- It can be tilted slightly backward toward the bottom of the violin, especially when you are about to tune the instrument.

